Wednesday, November 20, 2013

Centos : Create User with Root privilledges

This command can be execute to user who has root priviledge


  • Create user :

$ sudo /etc/sbin/useradd namefouser

  • Setting user password "

$ sudo /etc/bin/passwd nameofuser

  • Allow user to ssh
$ sudo vim /etc/ssh/sshd_config
There's some way to allow user to execute command :

  • Add user to sudoers  
$ sudo /etc/sbin/visudo
  • Add user to wheel group which is wheel is a group that sudoers allowed group.
$ sudo /etc/sbin/usermod -a -G wheel namefouser

Monday, November 18, 2013

Flush DNS on Linux

On Windows Operating system to delete all DNS query result we use to be use command IPCONFIG /FLUSHDNS, in Linux there's serveral command to flush DNS :

1. Flush dns by restarting NSCD service : 


  • $ sudo /etc/init.d/nscd restart
  • # service nscd restart
  • # service nscd reload

2. Flush dnsmasq DNS cache :

  • $ sudo /etc/init.d/dnsmasq restart
  • # service dnsmasq restart

3. Flush Caching BIND server DNS Cache :

  • # /etc/init.d/named restart
  • # rndc restart
  • # rndc exec

Monday, November 5, 2012

Exchange 2007 : Remove Domain Controller from List

There's no way to change the priority of which Domain Controller (DC) that used by Exchange Server, the only thing that we can do is just to remove unwanted DC from the list, I did this because there's a DC that has problem with replication with others.

By using Microsoft Exchange Shell type this command :
set-exchangeserver -identity FQDNofExchangeServer -staticexcludeddomaincontroller:FQDNofDCwanToRemove

If You want to remove more than one DC yang put "," than another FQDN of DC you want to remove.

Thursday, September 13, 2012

Linux Daily Command

This post listed my day to day Linux command that I use for managing and administering servers. This command based on Centos Linux.

1. Show Folder total size : du -ch /folder/subfolder | grep total   
2. Show Disk/Partition Usage : df -h
3. Flush DNS : $ sudo /etc/init.d/nscd restart

Tuesday, July 24, 2012

Installing iSCSI Target on Ms. Windows Server 2008 R2 - Eng.


For users of MS. Windows Server 2008 R2, Microsoft is providing low-cost iSCSI solutions. Responding to the needs of consumers will be iSCSI Microsoft on its official website provides a software iSCSI Target. Software that makes Ms. Windows Server 2008 R2 as the target server. Software iSCSI targets can only be installed on the operating system MS. Windows Server 2008 R2, while the client (iSCSI initiator) can be a variety of operating systems.

iSCSI targets can be downloaded disni, this file is a self-extracting package contained therein:
root:
-x64
    - Iscsitarget_public.msi (Support only Windows Server 2008 R2 x64)
    - IscsitargetClient_public.msi (Support All Windows Vista, Windows 7 and Windows Server 2008
-x86
    - iscsitargetClient_public.msi

Installation Process :
- Run the file in a folder iscsitarget_public.msi .. \ x64
- Click Next on the Welcome to ...

- Put a checklist on the I accept the terms ..., then click the Next button

- On the Destination Folder page, change the path corresponding to the Browse button if finish then click the Next button

- On this Join the customer... page, select I do not want .. if you do not want to send a detailed hardware specifications and other information to microsoft for the Improvement program. click the Next button.

- Select I do not want to use Microsoft update, if you do not want to do a update first before installing the iSCSI Target. click the Next button.

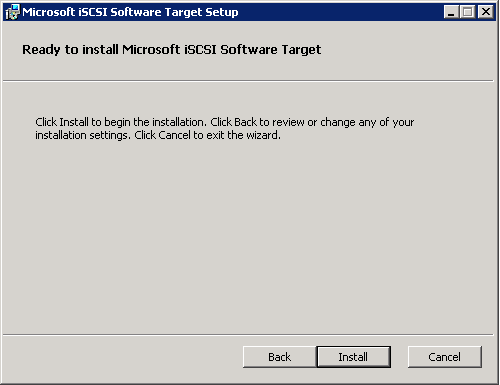
- Click the Install button

- Click the Finish


Next : Configuring iSCSI Target on Ms. Windows Server 2008 R2

Monday, July 23, 2012

Instalasi Microsoft iSCSI Target on Windows Server 2008 R2

Please click here for English version of this article

Untuk pengguna Ms. Windows Server 2008 R2, Microsoft menyediakan solusi murah iSCSI. Menanggapi kebutuhan konsumen akan iSCSI Microsoft pada situs resminya menyediakan software iSCSI Target. Software yang menjadikan Ms. Windows Server 2008 R2 sebagai server target. Software iSCSI target ini hanya bisa di-install  pada sistem operasi Ms. Windows Server 2008 R2, sedangkan client (iSCSI initiator) bisa berbagai sistem operasi.

iSCSI target bisa didownload disni, file ini merupakan self-extracting package didalamnya terdapat :
Root :
-x64
   - iscsitarget_public.msi (Support only Windows Server 2008 R2 x64)
   - iscsitargetClient_public.msi (Support All Windows Vista, Windows 7 and Windows Server 2008
-x86
   - iscsitargetClient_public.msi
Instalasi iSCSI Target
- Jalankan file iscsitarget_public.msi dalam folder ..\x64
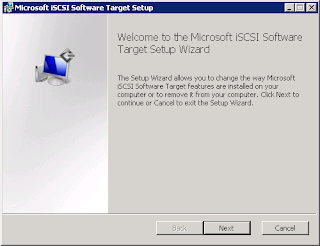
- Klik Next, pada Welcome to ...
                                     

- Beri tanda checklist pada I accept the terms..., kemudian klik tombol Next

- Pada halaman Destination Folder, ubah path yang sesuai dengan klik tombol Browse jika sd kemudian klik tombol Next

- Pada halaman Join the customer .., pilih I don't want .. jika anda tidak ingin mengirimkan detail spesifikasi hardware serta informasi lain ke microsoft untuk Improvement program. klik tombol Next.

- Pilih I don't want to use Microsoft update, jika anda tidak ingin melakukan pemeriksaan update terlebih dahulu sebelum instalasi iSCSI Target. klik tombol Next.

- Klik tombol Install

- Klik tombol Finish

Selanjutnya Configuring iSCSI Target on Windows Server 2008 R2

Thursday, June 28, 2012

Enabling Multicore Processor on Ms. Windows 7

Pada saat ini processor untuk komputer desktop maupun Notebook tersedia dengan mutlicore, tapi secara default sistem operasi Ms. Windows 7 belum memanfaatkan seluruh core yang tersedia hal ini tentu menjadikan kinerja komputer menjadi tidak optimal.

Guna memanfaatkan seluruh kemampuan processor yang dibeli anda harus mengaktfikan dengan melakukan langkah - langkah dibawah ini :
  1. Tekan tombol Start, pilih Run
  2. ketikan msconfig, tekan kunci Enter
  3. Pilih tab Boot, kemudian klik tombol Advance Options
  4. Beri tanda check pada Number of Processor
  5. Pilih jumlah processor sesuai dengan core pada processor yang kamu beli
  6. Klik tombol Apply
  7. Restart
English - Translated By Google

At this time processor for desktop computers and notebooks are available with mutlicore, but by default the operating system MS. Windows 7 not utilizing all available cores make it certainly is not optimal computer performance.
In order to utilize all the capabilities of purchased processor  follow this step by step guide :
  1. Press the Start button, select Run
  2. typing msconfig, press the Enter key
  3. Select the Boot tab, then click the Advanced Options
  4. Put a check in the Number of Processor
  5. Select the number of processor cores on a processor in accordance with what you buy
  6. Click the Apply button
  7. restart